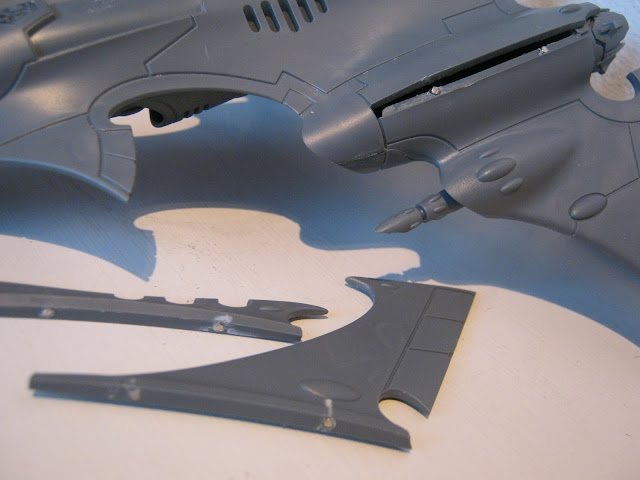
I was weak - I gave in and bought the Eldar flyer.
It presented itself as a challenge to be overcome in terms of magnetising and so I set to hoping it would be more straightforward than the Tau flyer. In terms of paint scheme, it will be standard Alaitoc blue and yellow with red stripes and aspect runes added to the unique crimson hunter wings to distinguish it. The pilots will also be interchangable.
 |
| Side by side with it's dark cousin. The Razorwing remains my favourite 40k flyer |
Assemble all the peripheral parts as seen. Despite my love of magnets, I go out of my way to avoid using them where possible and thus all of the weapons here are push-fit. Once a layer of paint is on them the already adequate fit will be even tighter and so no need for magnets. You can use gloss (ardcoat) to thicken the seal if needed.
I've planned to make both the pilots interchangable and so have used a trimmed down dire avenger body to mount the crimson hunter pilot and have (in progress as of the time of this post) cast a second set of arms from green stuff. I would HIGHLY recommend in retrospect that you simply make the canopy opaque to disguise the pilot as not only is making two pilots difficult but getting the canopy to be detachable is something I've yet to work out a solution to. I simply magnetised at the level of the waist as seen below:
As for the wings, small cylinder magnets were added at key points here. The rear central connector didn't require a magnet. For the Crimson hunter, I drilled a hole in the hull and inserted a small pin of the same diameter carefully into the wing piece - it's very thin so be careful drilling and also make sure it's a snug fit into the hole - this isn't a magent job but just allows it to be pinned in place. (not pictured) For the Wraithfighter, I added a magnet to both the hull and to the spiritstone plate so that they magentise together. (just don't drill through the detail by accident as I did!) See above for detail and ignore the one of the two magnets in the spirit rune - I misplaced the first. A good trick here is to put a blob of paint on the first magnet you put in place, put the part in place and then remove it so you're left with a paint imprint on the surface to aim for when drilling for the second magnet.

Here is the finished model(s) in all their glory:
Just a few creases to iron out but happy with the result so far. Any questions please ask. Enjoy.


Hi I was wondering what size magnets you used? I was thinking of magnetizing to have both variants so this guide is priceless - thanks!
ReplyDeleteHi,
ReplyDeleteI use 2mm long, 1.5mm diameter rods. If you're in the UK, I buy all my magnets from guys magnets on ebay. Good price, quick delivery and always good quality. Cheers.
Cheers dude!
ReplyDelete