
I am about to make the transition from my marine projects being better stage and non-marine projects taking a back seat, to the reverse. This will entail only ticking the final few boxes on my marine projects over the next few months while spending more time on both finishing up older no -marine projects as well as bringing some new armies to the fore, namely harlequins, talons, admech and genecults.
Presently I am assembling my harlequins which I accumulated during the release of death masque. I'm almost there with assembling everything and have now turned my attention to basing. I had always intended to use the same basing scheme with them as with my alaitoc eldar, and with the introduction of the ynnari I also intend to rebase my dark eldar in the same way so as to add unifomirty to the aeldari.
Previously, my basing theme was wraithbone, in this case an ulthuan grey shade, with swirling geometric shapes on them. This was designed to fit somewhat with the shapes seen on the wraithlord 60mm base. It was quite simple to execute, by pressing a layer of greenstuff atop the base and then carving some swirls into it. However, over time I have perfected it somewhat to the point where you can make a base in less than 2 minutes and so I thought I would share it as a tutorial.

What you'll need:
Plain bases.
Hobby knife
Vaseline
Greenstuff
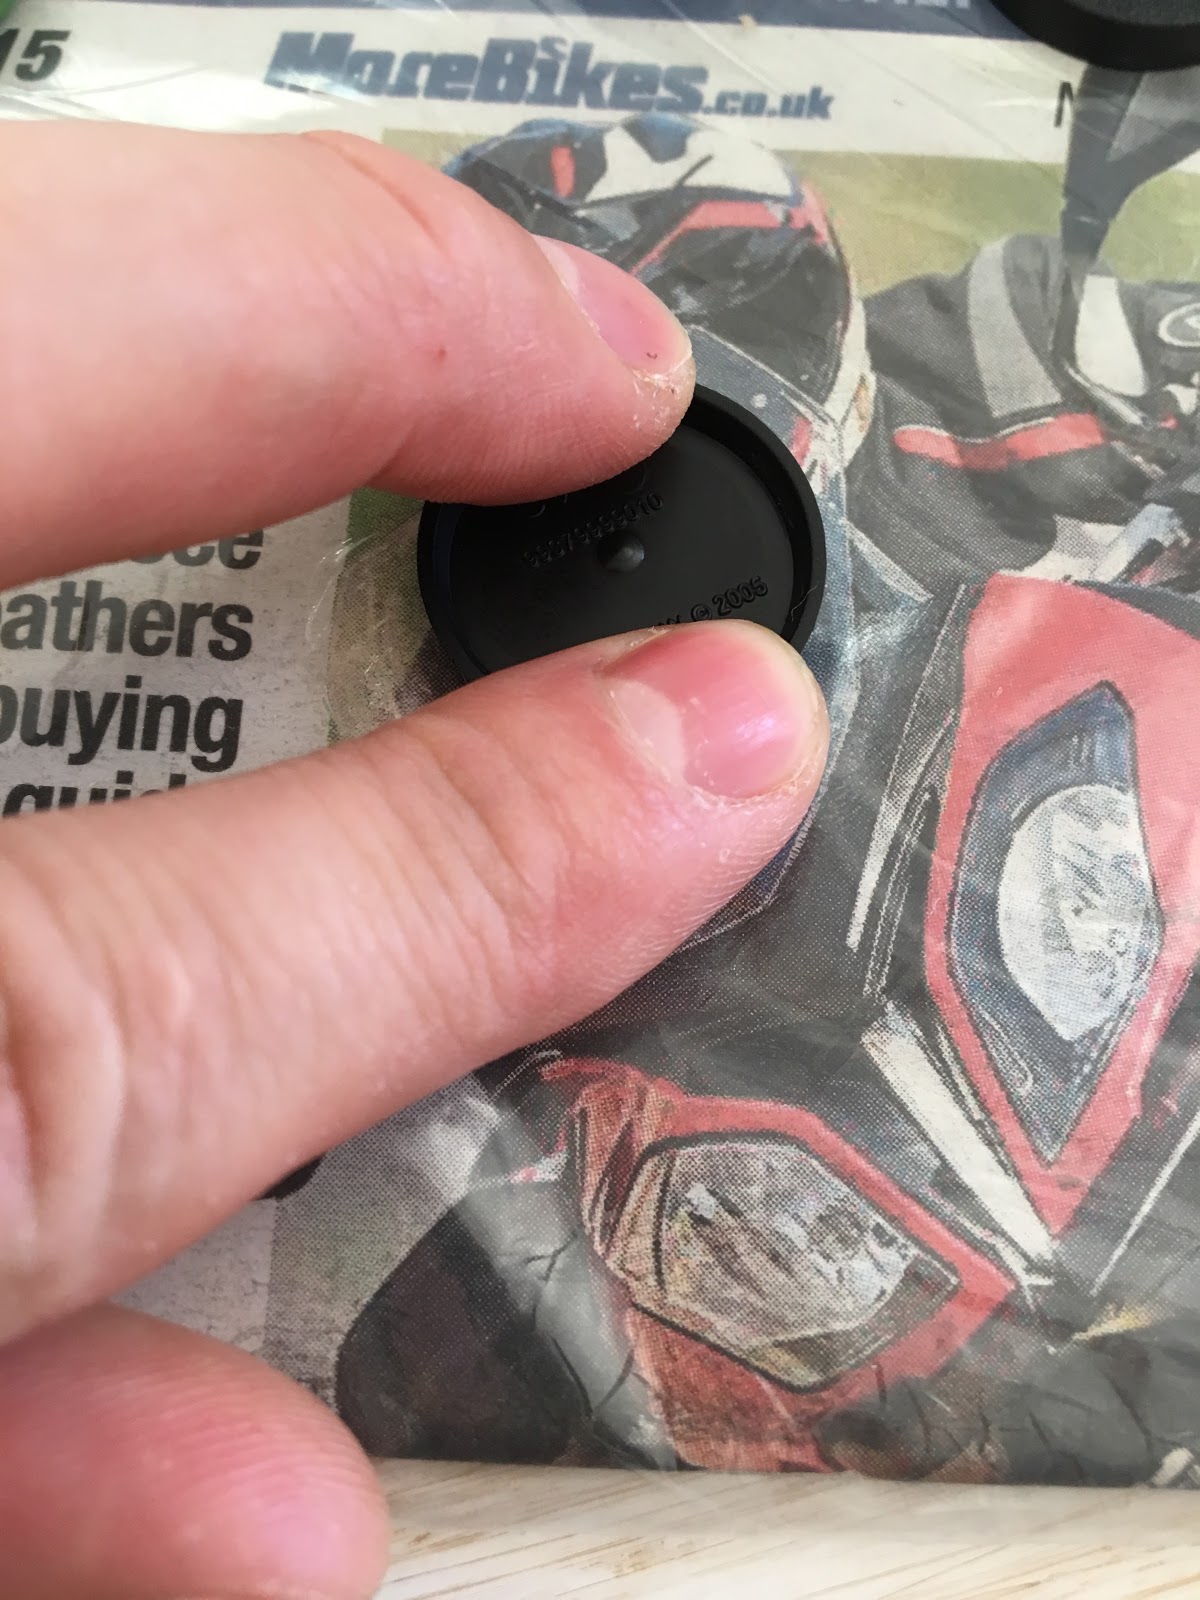
Some round lids, ideally different diameters and thicknesses
A non stick surface - I've found magazines still in plastic wrappers useful.
Get everything together and have one attempt first to get the idea before you try to do too many at once.
Step 1. Mix your greenstuff 1:1 as normal. No need to add Vaseline at this stage

Step 2. Run a small amount of Vaseline on the end of the knife and on the non stick surface. You don't have to do this each time just periodically to avoid sticking, say once every 4 bases.

Step 3. Break off a bit of greenstuff, about what is shown in the picture for a 25mm base, and stretch it across the base to a thickness of no more than 1mm ideally. A little goes a long way.

Step 4. Now press this face down against the Vaseline area on the non stick surface and move it in circular motions to smooth it over. Don't worry if it spills over the edge for now. Keep pressing in different areas until you get a smooth finish. Even pressure is key here or else you may end up with one edge being too thick and the opposite edge to thin so as to show some of the black base through the green stuff.
Step 5. Using a sharp knife with some Vaseline on the tip, cut away any excess from around the edge. Don't worry about bits on the base rim as they can always be filed off when everything has set. .

Step 6. Using your lids, press firmly to make geometric shapes on the bases. There's no real right or wrong here but I try not to overlap them too much. If you don't get an even depth when you first press, line the lid back up and try again.


There we have it. That's all there is to it. See some examples of them (before I perfected he technique) below, though bear in mind that as I wasn't using the lids to make impressions in he green stuff most of the impressions are free carved with a hobby knife - there's no reason you can't include some of this in your designs for variety. Simply paint in your base colour, paint a shade darker in the recess and a shade lighter around the edges. Cheers.


No comments:
Post a Comment